Kiln Formed Glass
Introduction
This article has been prepared as a web gallery asked me if I would describe kiln formed glass technique for their visitors. The article was later expanded in preparation for a lecture on the technique.
What's kiln formed glass?
Most people know about glassblowing, where the artist works with the glass while it’s liquid. The glass is, in its liquid shape, formed with tools and extended through blowing in the pipe the glass is on.
It’s fascinating and exciting to watch, as you can see how it’s being formed, and it seems a little ’dangerous’ because the glass is glowingly red and between a 1100° and 1300° Celsius.
Working with kiln formed glass is something entirely different. The artist works with the glass while it’s cold, before and after it has been through the oven. You prepare the glass for example by cutting it in different shapes, using colors, maybe use several layers of glass. Afterwards you’ll put it in the oven, so it can be melted together.
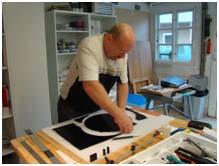 |
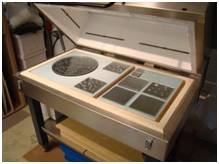
The glass can be bought in plates, and it’s being prepared and cut before it shall in the oven. Here is a round dish being prepared. |
Challenges with glass
Glass is a fantastic material. It’s fragile but also very strong.
It’s psychically strong because it can tolerate for examples moisture, sun and frost.
But it’s also strong in its artistic expression. The nature, the colors, the transparency of the glass and the reflection of the light, makes the glass a perfect material to create exciting art. The transparency gives depth, and the reflection of the surface plays with the light.
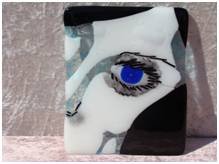 |
Because of the transparency of the glass, there has been created a depth around the eye, which makes the eye follow the viewer. The eye is built in 4-5 layers. |
Glass is fragile, when it has tensions
The glass can suddenly crack or explode if it has tensions. A light cooling from an open window can maybe make the glass plate break.
If you mix different glass, these tensions can come.
Or if you used a lot of other materials - like metal - in your design, it could create tensions.
Glass is a bad conductor of heat
That means, when the glass either is being warm or cold, it spread slowly through the surface to the middle.
If the temperature happens to quickly, the glass will get tensions, because of the deferens between the temperature inside and the surface of the glass. Especially the cooling of the glass must happen very slowly.
Personally have heard of a piece of glass art, there should cool down over 16 years, to avoid tensions. Then it just has to be perfect the first time.
Glass devitrifising (Gray glow)
Gray glow is a chemical reaction, which makes the glass dim, and that’s not pretty. Nobody knows exactly why it happens, but there’re a lot of different theories, for example a wrong heating curve, filth, chemicals, certain kinds of glass etc.
You can never be sure to avoid it. But every glass artist surely has some experience, so he can reduce the odds for gray glow, for example by avoiding too much heat, or have some transparent glass on top etc. etc.
Gray glow is unfortunately always a ”dark horse” during the process.
Bubbles
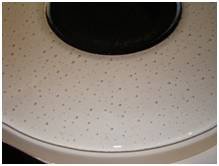
The kiln formed glass designs are almost always connected with several layers of glass pieces. Every time there’s more than one layer of glass, there’s a risk that air could be trapped between the layers, and then bubbles are created.
Different kinds of hardness
Even though the glass pieces you’ll use expose the same, they’re still able to melt at different temperatures. For example does black glass melt before white glass. This can mean that the black areas will grow more…
It takes time
And it’s not before you’ll open the oven for the last time, you know if the result is as wanted. Glass is a living, unpredictable material, and there can come many different surprises in shape or color. It takes many tries, to get it as you want.
But that’s also the charm of working with glass.
Techniques in kiln formed glass
Here’s mentioned the most used techniques in kiln formed glass:
Fusing
To melt the glass together. For example a full-fusing, where the glass pieces melts totally together.
There’s also tack-fusing or relief-fusing, where the layer on top doesn’t melt totally together with the bottom layers.
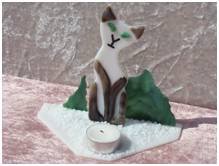 |
The cat is relief-fused as the ears, eyes and legs aren’t totally melted together with the white body. |
It’s the temperature, how long it’s on its highest and for how long, there decides how much the glass melts together.
Slumping
Using slumping the glass lies in a shape, and takes after the shape.
It’s the gravity there does the shaping of the glass, as it falls down into the shape.
Sagging
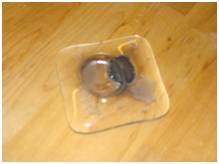
You can let the glass fall all the way down, so it lands on the oven surface, and then it gets a flat bottom so it can stand, or you’ll can - like the picture shows - glue it to another piece of glass, so it can stand.
The glass lying on the edge of where the hole started is being removed afterwards.
Combing
Molding
There’s more exciting molding techniques, I will here mention three of them:
Sand molding
In this technique you’re molding in sand, where you have made a shape in the sand. It’s the most free form of molding, and it’s very easy. You’ll just lay pieces of glass in the sand, and melt it in the oven.
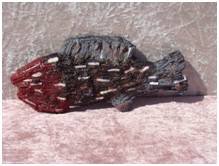 |
If you’ll turn the pieces of glass vertical, and don’t totally melt it, it will look like the fish above. |
Open gypsum molding
At first you’ll have to make a shape in gypsum, for example a shape to make a mask. Because of the talent of the gypsums it can be very fine and very detailed.
Like with the sand molding you’ll fill up the shape with pieces of glass, perhaps in different colors, and then melt the glass in the oven.
The glass which in the oven turns upwards will always melt to be flat, like the behind of the fish above.
Closed gypsum molding
In a closed gypsum molding you can make 3-dimensionel molding, as there is no need for very much of the product to be flat.
A closed gypsum molding is for example a gypsum ball, there's hollow in the middle – for example as the shape of a broccoli - which shall be filled with glass. It’s more difficult to work with the closed gypsum molding than the open, there’re a lot more challenges.
The gypsum form can be made by a shape which looks like how you want the result to look. It can be a real broccoli or a dancing woman made by beeswax.
You’ll built more and more layers of gypsum on the real broccoli or the wax shape until you’ll have a gypsum ball. Afterwards you’ll burn the gypsum form in the oven, where the broccoli for example will evaporate and then leave a hollow room, which will look like the real broccoli.
Other techniques / effects
Basically you'll create your design as a mixture of shape, colors and patterns / figures. Though many artists also want to give their designs a little something else, and there’re lots of possibilities to do that.
Here’s illustrated some of the possibilities:
Pretreatment
Mostly the pretreatment contains cutting, drilling, saw in and grind the pieces of glass so they fit together.
Sometimes you want to use some glass which already are melted together in you new design.
The using of special glass
Besides the glass plates, you can also buy other kinds of glass, in different thicknesses and different shapes; bars and balls, and so on.
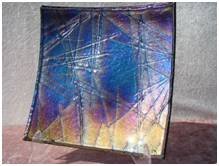 |
There’s a thin layer of metal in the colors of the rainbow. The colors play with the light, and give life to the plate. |
Using of other materials and chemicals
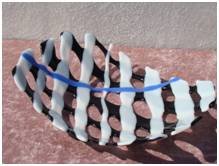
There exist a lot of different metals in a lot of shapes, which you can use. Some of the metals change colors if there’s oxygen present during the burning, for example copper, which turns blue. But you’ll have to be careful with use of metals, because it can also create tensions in the glass.
Some of the metals can also be very expensive, and very hard to work with.
The appearance of bubbles and pretty colors can happen by using oxides, as manganoxyd which turns purple during the burning. Colorless bubbles can be made by baking powder.
Aftercare of the glass
The glass can be polished, graved, abraded or you can drill holes so it can be hung up.
Sandblasted glass can be matt and velvety on the surface. You can cover some of the glass, and that way decide where there shall be sandblasted, that way you can make patterns.
Production of raw glass
For a long time there have been problems working with multiple colors in the same design as glass in different colors often have different coefficients of expansion. It has forced artists to work only with colorless or one color glass, or to accept the very high risk that the glass would explode when taking it out of the oven.
Today, several glass suppliers developed recipes for the production of colored glass, where all the colors are almost the same coefficient of expansion.
Some glass manufacturers have automated most of the production. I use the more expensive glass from Bullseye in the United States that still hand rolls the glass. Their glass has much more life and shine where I think the machinemade glasses seems dead and looks like plastic.
Bullseye combines ancient techniques with modern computer equipment for the production of raw glass. The molten glass is placed on a roll, which is operated manually. Then the glass rolls through a long tunnel, where it cools down slowly and annealing under constant surveillance by humans and computers.
At last ...
I sense that kiln formed glass is going through a development these years, and there constantly comes new techniques and new designs. I often look at other glass artists, and I’m always very impressed by the creativity and quality many of the coldglass artists have.
|
Visit Me
Micko v/Michael Kofod Søgårdsvej 8, Gelstrup 4500 Nykøbing Sj |
|
|
I'm exhibiting in Gallery 3G.
Note that not all GPS can find me!
|
|
Open May 1 - September 15
|
|
Thursday to Sunday
Holidays
|
10am - 5pm
10am - 5pm
|

